Steam Condenser Setup Guide — Assembly & First Brew (Indoor Brewing)
Share
Brew indoors. No steam. No extractor hood. The BrewTaurus Steam Condenser turns the steam from your boil into water that runs straight to the drain — so you can brew in the basement, garage or kitchen all winter without a cloud on the ceiling. This guide walks you through the assembly and the first brew day, step by step.
What you need
- Sight Glass Steam Condenser / Still Lid in the size of your kettle opening: B40L (2" TC) · K40 (2" TC) · B70L & B80L PRO (4" TC) · K80 (4" TC) · K200 (4" TC)
- 2" Steam Condenser Kit — the condenser column, connecting tube, elbow, clamps and gaskets
- On 4" lids: the 4"→2" Tri-Clamp reducer, which steps the lid's 4" top port down to the kit's 2" connection
- Connection Kit — Water & Drain — 2 m silicone drain hose, 2 m EVABarrier water line and the duotight 3/8" joiner
- A cold-water tap and a drain (or a bucket) within reach of the hoses
How it works
During the boil, steam rises through the lid port into the condenser column. Inside the column, a fine stream of cold tap water meets the steam and condenses it instantly; the condensate and the cooling water then run out of the bottom of the column through the drain hose. The system stays open at all times — nothing is sealed, no pressure builds up — and the sight glass in the lid lets you watch the boil the whole time.
Assembly — step by step
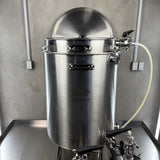
- Lid: seat the lid with its silicone gasket on the kettle rim.
- Reducer (4" lids): clamp the 4"→2" concentric reducer onto the lid's top port. On 2" lids (B40L, K40) skip this step.
- Elbow: clamp the 2" TC elbow onto the reducer, pointing sideways towards where the column will stand.
- Connecting tube: clamp the straight 2" tube between the elbow and the side port of the condenser column's T-piece.
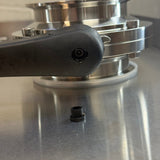
- Column: the column hangs vertically off the T-piece next to the kettle, bottom outlet pointing down. Check that every Tri-Clamp joint has its gasket seated and the clamps are hand-tight.
- Water in: connect the EVABarrier line from your cold-water tap to the inlet at the top of the column — the duotight 3/8" joiner clicks it together without tools.
- Drain out: push the silicone hose onto the barb at the bottom of the column and route it to the drain or a bucket. The hose must run continuously downhill — no kinks, no upward loops.
On brew day
- Open the cooling water just before the wort reaches a boil. A thin, steady stream is enough — you are condensing steam, not chilling the kettle. If any steam escapes the column, open the tap slightly more.
- Watch the boil through the sight glass and control its vigour with the element power, exactly as you would with an open lid.
- Keep the drain line open and falling for the entire boil — never block or pinch it.
- After the boil: close the water, give the column a minute to drain, then remove the condenser and lid and rinse everything with warm water.
Safety: the column and lid get hot during the boil — handle them only by the clamps or with gloves. The steam condenser is not a pressure system: the drain outlet must stay open whenever the kettle is heating.
Questions about your setup? Write to us at info@brewtaurus.com — a photo of your kettle and lid is the fastest way to get a concrete answer.
![*PRE-ORDER* PF40 Fully Jacketed Unitank +[Extra accessories]](http://brewtaurus.com/cdn/shop/files/IMG_0435.heic?v=1791212201&width=533)